Monthly Archives: August 2013

Where’s My Pumpkin Latte?

Posted on

Seriously…where is my Spiced Pumpkin Latte? I mean, it’s been October in my house for the last couple of weeks so I need my appropriately matched coffee fix! With that said…lets check out all of the incredible Fall Soaps that have been relaxing on my curing rack…

20130826-200125.jpg
Cinnamon Roll Soap…no, you can’t eat eat them but they definitely smell good enough to eat!

20130826-200223.jpg
Frosted Pumpkin returns this year to please all of us that loved you so much last Fall.

20130826-200319.jpg
Spiced Apple Cider. A new and instant Fall favorite. This one will be hard to keep in stock it’s THAT good!

20130826-200426.jpg
Cracklin’ Birch. This is what a crisp Autumn Day smells like! This one is replacing last year’s Fresh Fallen Leaves.

20130826-200602.jpg
Pumpkin Pie Soap made with Pumpkin Purée, an Oatmeal ‘Crust’ and a hand painted soap pumpkin. Words cannot describe how flipping amazing this soap is!

Did I go a little crazy with the pumpkin soaps? Meh…I haven’t even begun!!! I’ll be adding Pumpkin Lager Soap in the next couple of weeks….So there’s that. 😉 Keep your eyes peeled for Pecan Pie Soap and a (newly requested) Berry Wine Soap made with Pinot Noir!!

How It’s Made – Just Ducky

Posted on

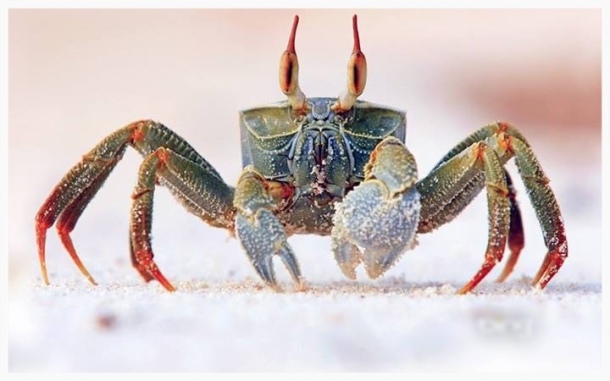
How have gone all this time without making a duck themed soap? I’ve been planning it in my head for quite some time but couldn’t quite work out the proper color combo or find the perfect fragrance. With the help of Joanna’s Crab Challenge in the Facebook Soap Making Group, Soapers Retreat…I found my color inspiration. Which absolutely worked because the colors were identical to my logo colors. Crab Challenge, you ask? We were tasked to create a soap using the lovely colors in this crab pic:

20130822-170245.jpg

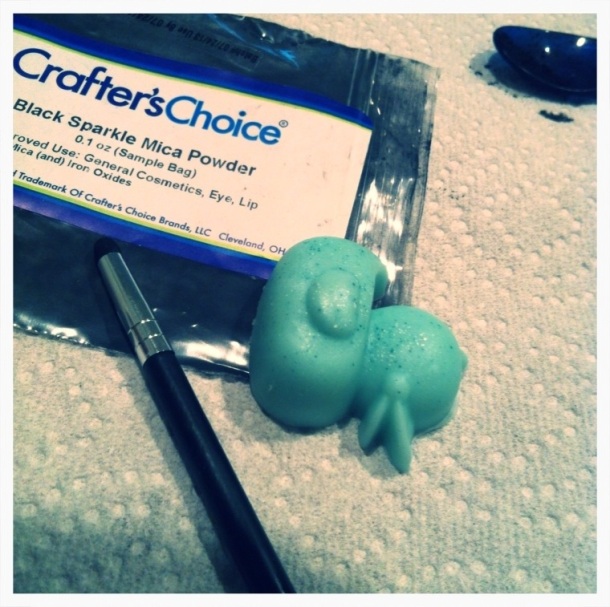
Then I had a pretty genius idea to combine Bramble Berry‘s Celestial Waters, Yuzu & Red Apple fragrances for my scent. From there…I just kinda rolled with it. Using a Ducky ice cube tray, I made a bunch of little duckies with Bramble Berry’s melt and pour base and some Aqua Pearl Mica to color the ducks.

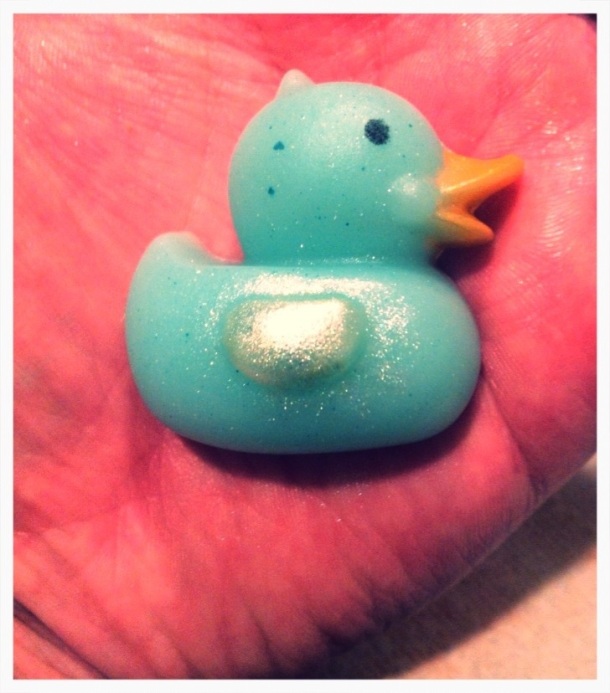
The ducks were a little boring…they needed some personality so I decided to ‘paint’ them with mica. I started with their eyes using some black mica and an eyeliner foam brush I had never used.

20130822-170845.jpg

20130822-170935.jpg

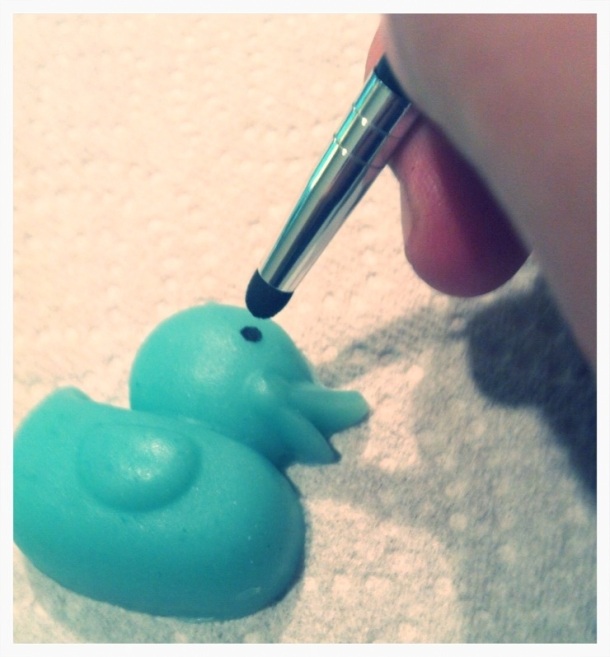
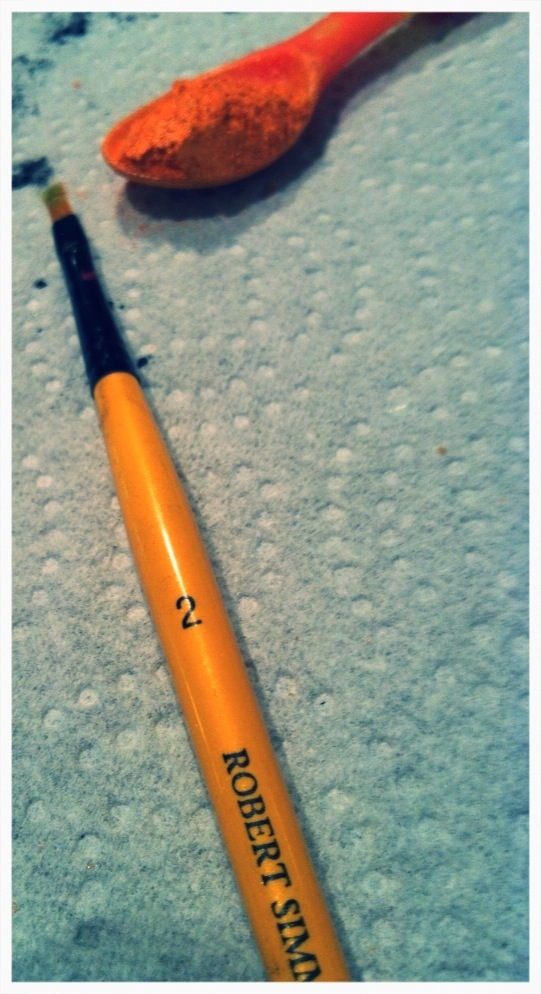
See? Big difference already! All of the eyes of been added to 15 ducks (my 5lb slab mold makes 15 bars at a time). Next up…painting the duck bill. For this I used Sunset Peach Mica and applied it with a flat #2 brush I had laying around from a previous life when I thought I could paint. 😉

20130822-171346.jpg

20130822-171426.jpg

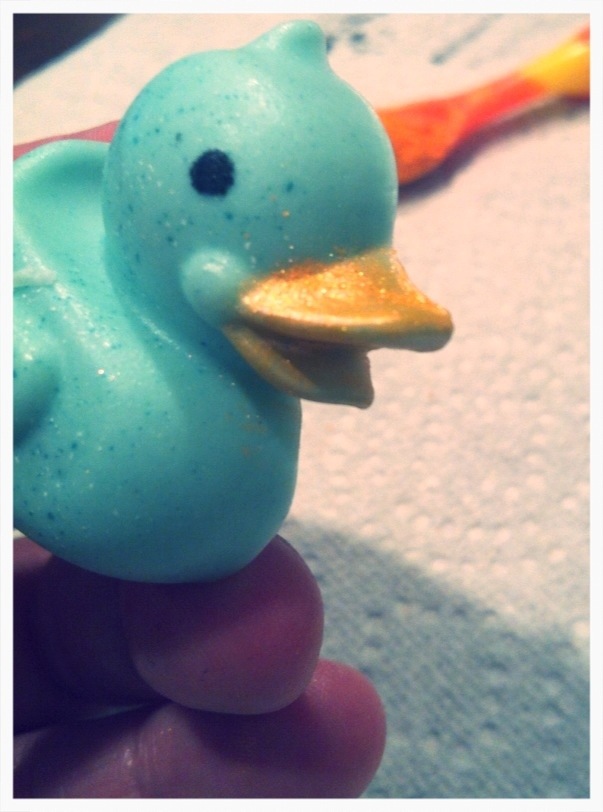
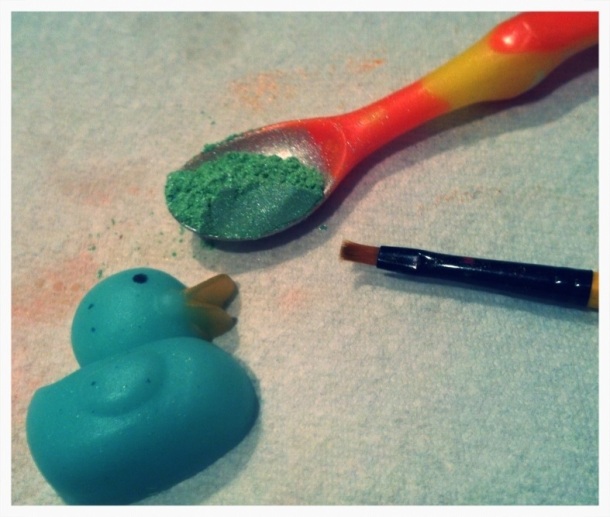
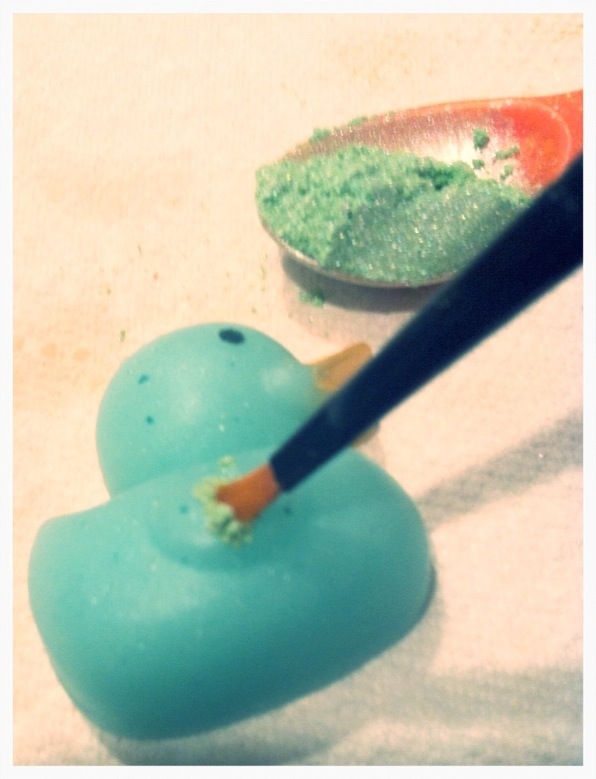
How flipping cute is this Duck?!?! Lastly, I wanted to paint the wing. I used too light of a green on this batch of ducks. I do suggest using the Conservatorie’s Golden Green Mica…or any yellow-y/ green mica (I used Peak Green in the pics). Using the same, but cleaned flat brush…I painted the wings.

20130822-172006.jpg

20130822-172026.jpg

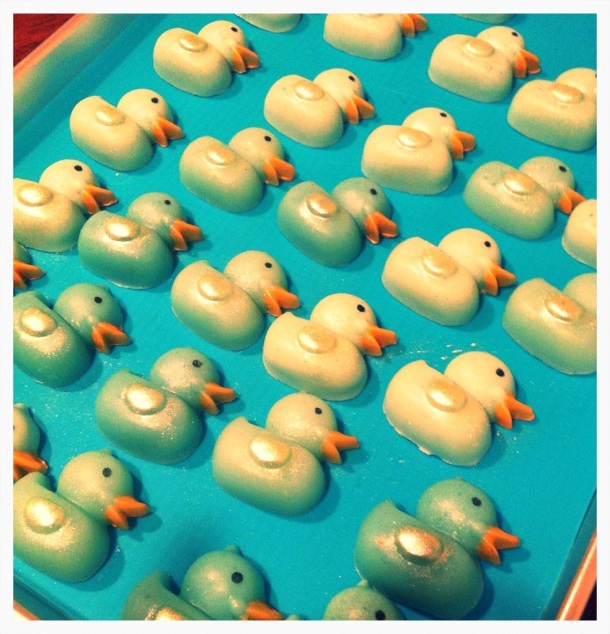
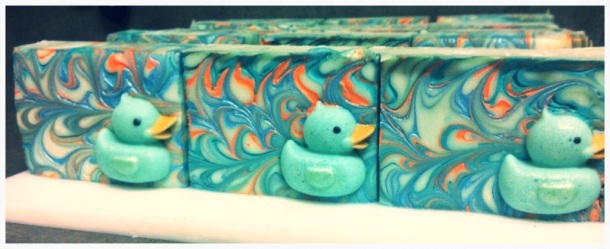
The finished product:

20130822-172137.jpg

A tray of painted Ducks!

20130822-172344.jpg

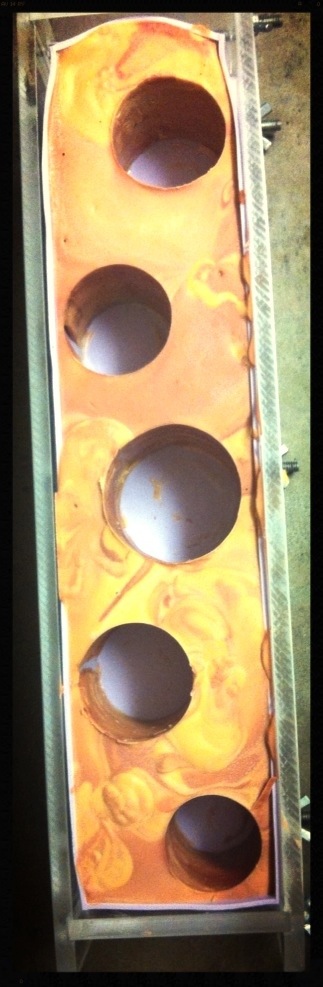
Now it’s time to prep the colors and make some soap! This pic below details my color prep.

20130822-172445.jpg
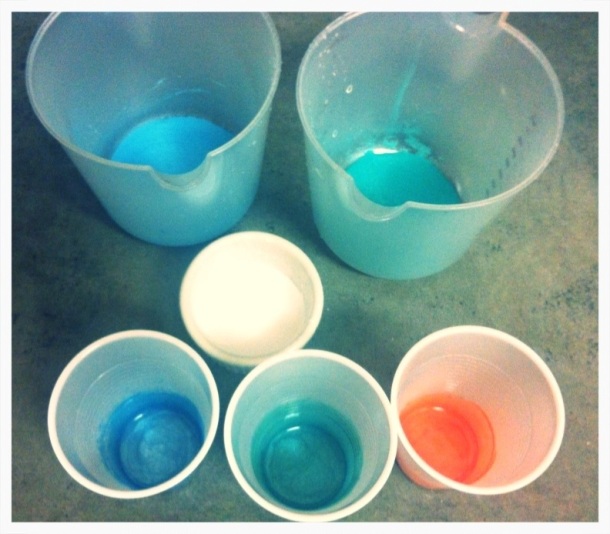
Top Row: Sky Blue Mica mixed w/ water – Aqua Pearl Mica mixed w/ water.
Middle Row: Titanium Dioxide
Bottom Row: For the Mica Oil Swirls- Sky Blue Mica – Aqua Pearl Mica – Sunset Peach Mica all mixed with olive oil. Approximately 1TBSP Oil to 1/2 TBSP of mica. You want the consistency of fresh nail polish.

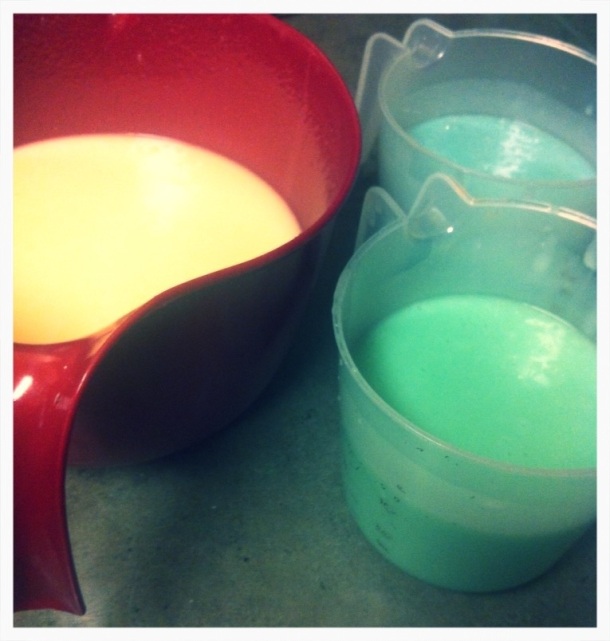
Now to make the soap. I’m going to do an in the pot swirl using the Titanium Dioxide as the main color with the Sky Blue Mica and Aqua Pearl Mica as the swirls.

20130822-173028.jpg

Looking at the pic below, I poured the Sky Blue Soap in at 12 o’clock and 6 o’clock and the Aqua Pearl Soap at 3 o’clock and 9 o’clock. Using the spatula, I started at 12 o’clock and drew a clockwise circle around the pot and came down to the center.

20130822-174122.jpg

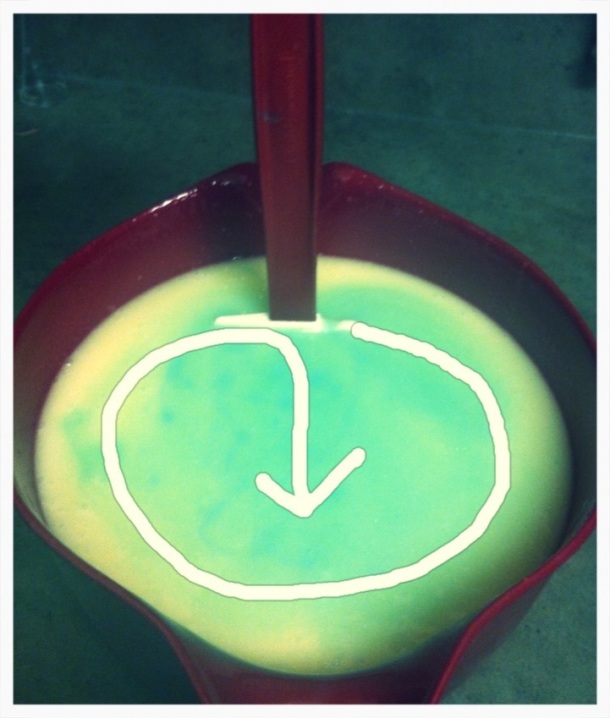
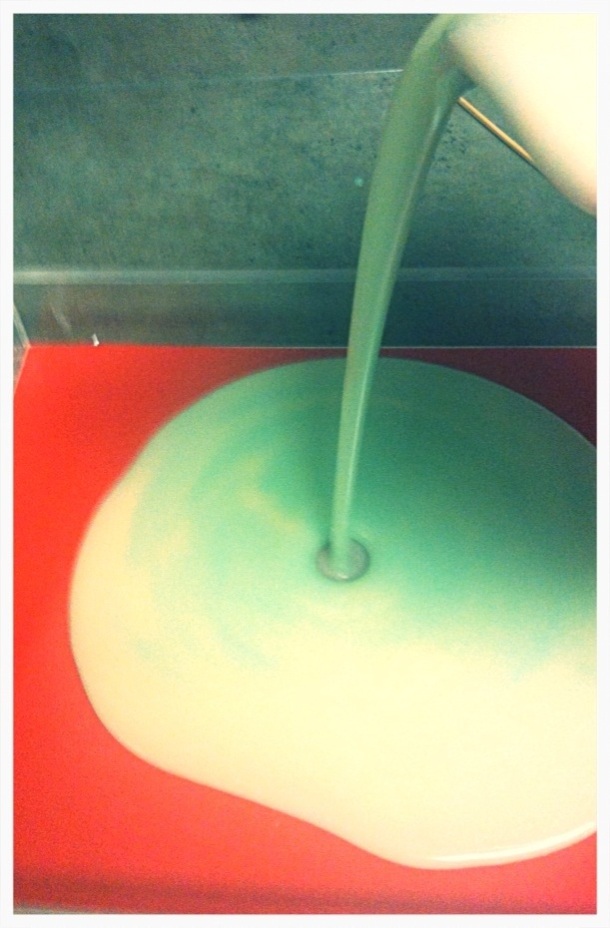
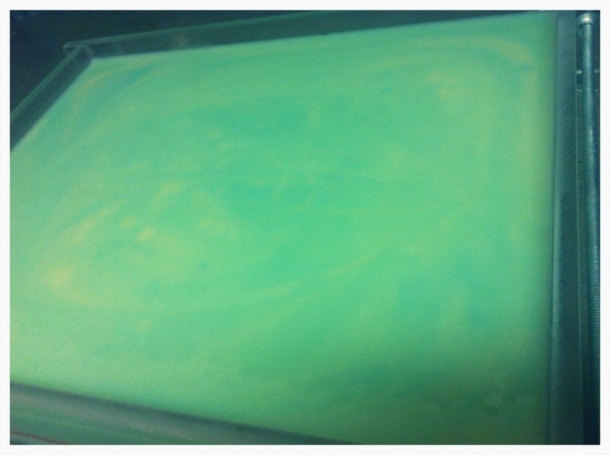
I started my pour in the center of the mold. I finished up by zigzagging the soap throughout the mold to help the swirl.

20130822-174244.jpg

20130822-174303.jpg

Now it’s time to pour the mica oil colors. I poured in an overlapping ‘S’ pattern.

20130822-174357.jpg

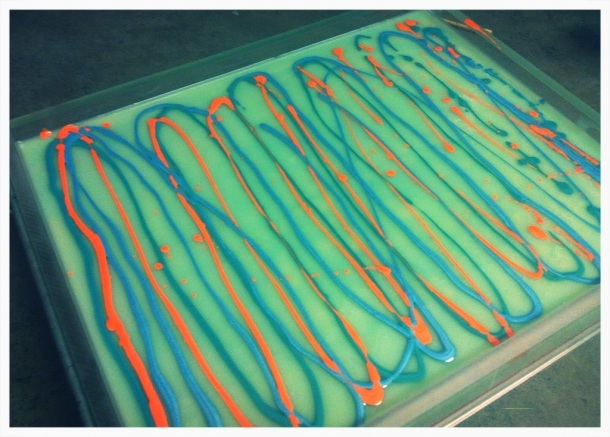
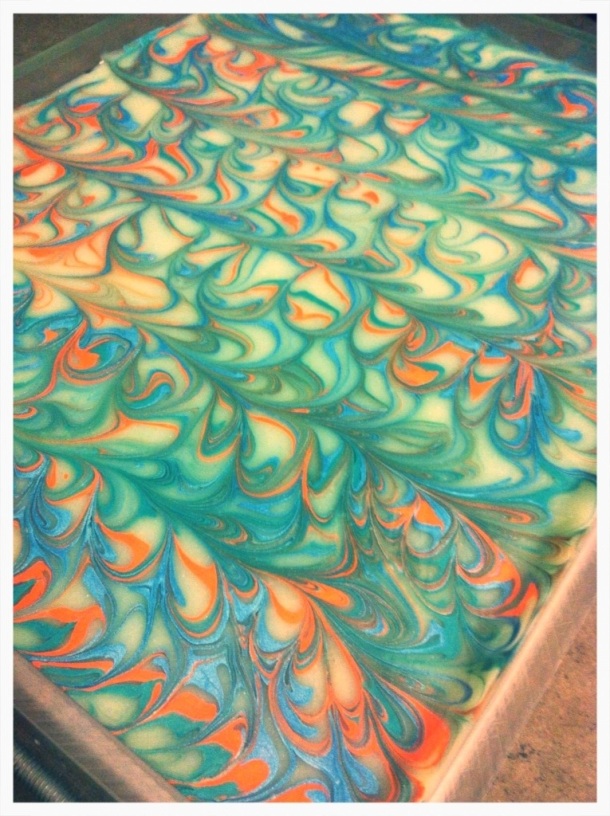
Next is the swirl. Here’s the outline I used with the tip of my skewer:

20130822-174939.jpg

What it looks like on the soap:

20130822-175029.jpg

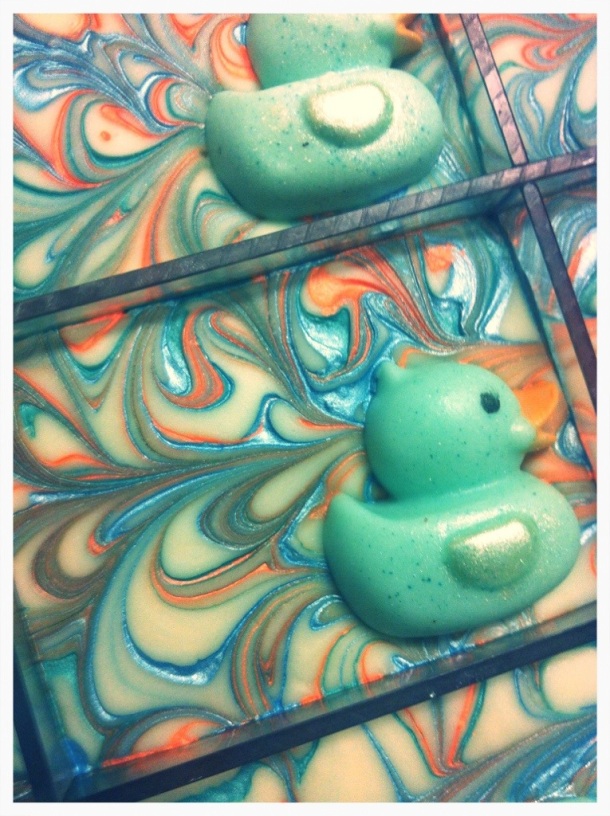
I inserted my dividers and placed my Ducks onto the face of the bar, pressing them in gently.

20130822-175146.jpg

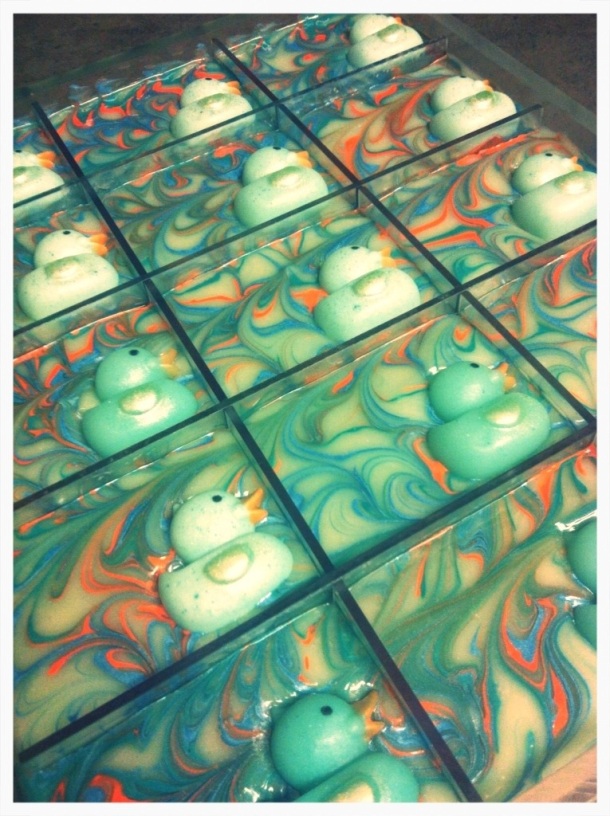
What I absolutely LOVE about the mica oil swirl is how amazing the swirls look after the oil has absorbed into the soap:

20130822-175316.jpg

24 Hours later they’re ready to unmold and cure.

20130822-175407.jpg

As for the name…I cannot take credit for it! My Bubble Buddy Tricia, owner of Scentability named this creation. So thank you Tricia!! ❤

How It’s Made – Cracklin’ Birch

Posted on

My very first Fall batch of the season was made with Nature’s Garden’s Cracklin’ Birch fragrance. I’ve heard lots of other soapers absolutely rave about this fragrance so I knew I had to add it. From first sniff, I was transported to a forest of birch trees on a crisp Autumn morning. The leaves have already begun to change and they were crunching under my feet as I walked. Crazy right? Some fragrances have a very visual effect on me. I scoured my friend Google for an image that encompassed what I saw when I smelled the fragrance. I was looking for some color inspiration and here’s what I found:

20130814-193602.jpg

Perfect. Now to make my own birch tree forest in soap. I knew I wanted to somehow place ‘birch trees’ throughout my loaf…. I gathered different sized empty fragrance bottles, filled them with water (because water is denser than oil, it keeps them from floating away as I pour my soap), wrapped them in freezer paper and randomly placed them throughout my mold.

20130814-195439.jpg

I knew I wanted 3 solid colors to represent my fall foliage so I chose a lovely green, chocolate brown and mixed a yellow mica with a teensy bit of brown.
For my 5lb mold, I made 2.5 pounds of my slow moving recipe. This fragrance does accelerate so I soaped it at a low temp to give myself some time to work with it. Using the 3 colors described earlier, I made a quick in-the-pot swirl with them and poured the soap into the mold around the bottles.

20130814-194612.jpg

20130814-195541.jpg

I let the soap set up overnight and removed the bottles in the morning.

20130814-194848.jpg

20130814-194858.jpg

Now it was time to make the birch trees. To achieve the birch type look I chose a 3 color palette of white, black and grey. A funnel pour in each “tree hole” seemed like the best option to achieve the proper look. I used about 1 to 1.5 pounds of soap for this step. I ended up making entirely too much soap for each step so yeah….lots of Cracklin’ Birch soap samples this fall. 😉

20130814-195813.jpg

I used a funnel for a more precise pour since I was working with such small spaces.

20130814-195916.jpg

Yeah…so I’m not the neatest soaper. I did my best to stay in the lines but what are you gonna do? Right?

20130814-200114.jpg

I waited an additional 24 hours to allow the trees to set nicely. Check out what the bottom looked like after I unmolded:

20130814-200225.jpg

Time to cut it and check out my handy work….

20130814-200511.jpg

20130814-200534.jpg

I’m happy with how it turned out. I’ve already thought of ways to make it even better…this batch will permanently replace my ‘Fresh Fallen Leaves’ from last year. This fragrance captures a crisp Autumn day MUCH better. My new addition to the next batch will be small soap leaves scattered on top of the loaf.